Heartopia Painting Tools Guide
The Drawing Board unlocks a full creative system — custom clothes, painted furniture, and gallery art. This guide covers every tool, both unlock quests, exact material costs, and pro tips that most guides miss.
“Once you unlock the Drawing Board, you can paint on canvases, sew custom outfits, and decorate furniture — all from one tool. Updated February 2026 for v0.4.2.”
In this guide
How to Unlock Heartopia Painting Mode
Painting unlocks through a two-quest chain at D.G. Member Level 14.
Reach D.G. Member Level 14 by completing daily Resident Requests.
1Quest 1: Brushstroke Whimsy
- Talk to Dorothee at the Clothing Store — she gives you Jean Morin's Letter.
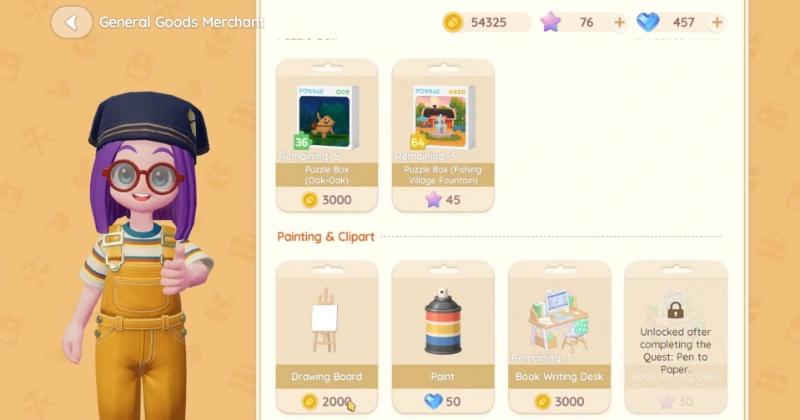
- Visit Ka Ching at the General Store and buy the Drawing Board for 2,000 Gold.
- Place the Drawing Board, paint something, and save it.
- Interact with the Drawing Board again and tap the middle icon above it to open your Gallery.
🎁 Reward: 10 Tailoring Tickets.
2Quest 2: Painted Furniture
After Brushstroke Whimsy, Ka Ching offers this quest.
- Use the Drawing Board to apply a clip-art design to a piece of Joinery Furniture.
- Apply the design at your workbench using 1 Ink.
🎁 Reward: 5 Ink.
All Heartopia Painting Tools Explained
Open the Drawing Board and tap the paintbrush icon to enter the canvas editor. All tools are on the left panel.
| Tool | What It Does | Pro Tip |
|---|---|---|
| Pencil / Brush | Draw and color individual pixels; adjustable size (S, M, L, XL) | Use Small for details, Extra Large for solid background fills |
| Paint Bucket | Fills a connected area with one color instantly | Fill base layers first, then add detail on top |
| Shape Tool | Draws circles, squares, stars, hearts, and lines | Use shapes to build pixel art grids and borders quickly |
| Eraser | Removes pixels cleanly with adjustable size | Same sizes as the brush; use Large to clear sections fast |
| Stamp / Clip-art | Applies pre-made designs: flowers, animals, trees, candies, and more | Non-artists can build appealing designs using stamps alone |
| Coloring Pages | Pre-drawn outlines you fill in — no drawing skill required | Great for beginners; structured and safe starting point |
| Color Palette | Basic palette by default; tap the advanced icon for the full color picker | Build a small color swatch strip on one edge of the canvas, then eyedrop from it — faster than reopening the palette each time |
| Grid & Zoom | Overlay grid for pixel-level alignment; pinch or tap to zoom | Always enable the grid for clothing designs — it shows how patterns map onto garment seams |
| Mirror / Symmetry | Paints symmetrically on both sides at once | Makes symmetrical clothing patterns and logo designs much faster |
| Undo / Redo | Reverses or restores the last brush stroke | Hold for multi-step undo |
| Decal Templates (v0.4.2+) | Pre-made borders, frames, and icon sets you can stamp and resize | Use as a starting layer, then paint over or around them for custom results without starting from scratch |
| Save (Floppy Disk) | Saves your design — top-left corner of the canvas editor | Save frequently; there is no auto-save in the paint editor |
The canvas has a limited resolution by design. Pixel art, 8-bit sprites, and retro-game character portraits look intentional and distinctive — embrace the style.
Canvas Types
Choose your canvas based on what you are making.
Standard Canvas
Practice, wall art
Free to use; good starting point
High-Fidelity Canvas
Detailed art, smooth gradients
Higher resolution; better for portraits
Clothing Template
Custom outfit design
Requires 1 Tailoring Ticket to finalize at workbench
Furniture Template
Custom furniture surface
Requires 1 Ink to apply at workbench
Available canvas sizes
1:1 (square), 4:3, 3:4, 16:9, 9:16 — choose based on the shape of your project.
How to Make Custom Clothes
- 1Open the Drawing Board → tap the paintbrush icon → select New Drawing → choose a Clothing Template.
- 2Design your outfit using any tools, then save (floppy disk icon, top-left).
- 3Go to your Workbench → tap the Scissors icon (third icon).
- 4Select the clothing type and your saved design — a preview appears on the left.
- 5Confirm — this uses 1 Tailoring Ticket.
To wear your design
Wardrobe → Custom Designs tab → equip the piece.
Tailoring Tickets
- ✅ 10 free Tailoring Tickets from completing Brushstroke Whimsy.
- 💎 Additional tickets: 80 Moonlight Crystals each.
Budget tip: use the 10 free tickets to experiment. Settle on a design you love before spending Moonlight Crystals.
How to Paint Custom Furniture
Only Joinery Furniture supports custom painted designs. Other furniture types can be dyed (solid color only) but not painted with custom art.
- 1Open the Drawing Board → tap the paintbrush icon → select New Drawing → choose a Furniture Template.
- 2Design the surface and save.
- 3Make sure the furniture piece is in your inventory or storage. It will not appear in the selection list if it is placed outside — this is the most common cause of confusion.
- 4Go to your Workbench → tap the Brush icon.
- 5Select the furniture item, choose your saved design, and confirm — this uses 1 Ink.
Getting Ink
- ✅ 5 Ink from completing the Painted Furniture quest.
- 💎 Additional Ink: 50 Moonlight Crystals each from the General Store.
Furniture Dye (solid color, no design)
Go to your workbench → select any furniture → apply dye. Dye costs 100 Gold from Ka Ching, or find it free by popping blue bubbles around town.
Gallery and Displaying Your Art
📂 Interact with the Drawing Board → tap the middle icon of the three that appear above it. The Gallery is not inside any menu.
Your Gallery is organized into four sections: canvas paintings, clothing and shoe designs, furniture designs, and collectibles.
Tap the three-dot menu on any item to rename, duplicate, or delete it.
Displaying paintings at home
Place finished canvases in frames or easels inside your house. Displayed artwork is visible to friends and neighbors who visit.
Complete Material Costs Reference
| Item | Cost | Where to Get |
|---|---|---|
| Drawing Board | 2,000 Gold | Ka Ching, General Store (unlocks at DG Lv 14) |
| Tailoring Ticket | 80 Moonlight Crystals | Store / 10 free from Brushstroke Whimsy quest |
| Ink (furniture design) | 50 Moonlight Crystals | General Store / 5 free from Painted Furniture quest |
| Dye (solid color) | 100 Gold | Ka Ching / free from blue bubbles |
| High-Fidelity Canvas | Premium store | In-game store |
Pro Tips for Better Designs
Build a color swatch strip
Before painting, lay a row of your key colors along one edge of the canvas. Eyedrop from it instead of hunting the palette each time. Delete the strip when done.
Use the clothing grid
Always paint clothing with the grid visible. It reveals how the template maps onto the garment so patterns line up at seams.
Stamps are a feature, not a shortcut
Combining clip-art stamps with hand-drawn elements creates more polished designs than either approach alone. Use stamps for foliage, borders, and animals; draw unique patterns by hand.
Decal templates as a starting layer
Use the v0.4.2 decal templates as a base layer, then customize around them. Faster than starting from scratch, more personal than using them alone.
Duplicate before experimenting
Use the Gallery duplicate function to back up a design before making changes. The editor has no version history beyond undo.
Embrace pixel art
The canvas resolution is limited by design. Pixel art, 8-bit sprites, and retro-game portraits look intentional and are celebrated by the Heartopia community.